PHP to Create Custom Post Types & Link-Only Access in WordPress
While working on a web design project recently, my client made a feature request for:
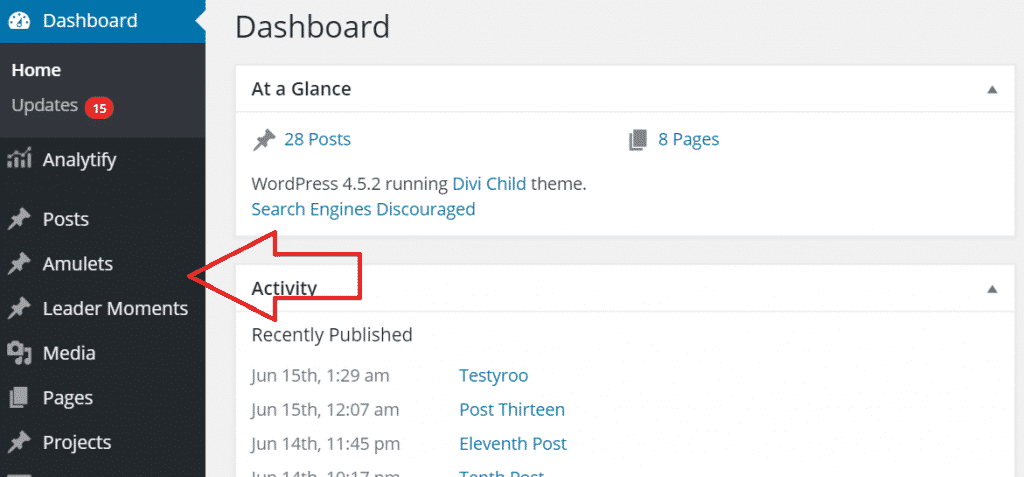
- Two new custom post types – to be displayed underneath the Posts section on the WordPress administration screen, with similar functionality to posts.
- Viewable by link only – these two new custom posts needed to be viewable by a direct, private access link only. It was not sufficient to merely not display them on the client’s website but keep them Public (in which case the normal permalink could have been used); likewise, it was not sufficient to use WordPress standard password protection, for fear that the client’s email subscribers may get confused, have technical difficulties, or generally be too lazy to type in the password, which are realistic concerns to have.
- Discluded from RSS feed – the custom post types had to be removed from the site’s main RSS blog feed.
Last but not least, my client was hopeful the solution would be easy and user-friendly. Workarounds were okay if absolutely necessary, but it was ideal for the solution to look and feel turnkey in the WordPress environment.
The Solution (The Code)
The solution was to add the following PHP code to my client’s WordPress functions.php file, which I took a step farther and inserted using the My Custom Functions plugin (preventing the code from being lost during theme updates, etc.).
Note that you can copy/paste the above code directly into your functions.php file, or alternatively into the Custom Functions box (if you’ve installed the plugin) – and you’ll immediately see two new post types:
- Amulets
- Leader Moments
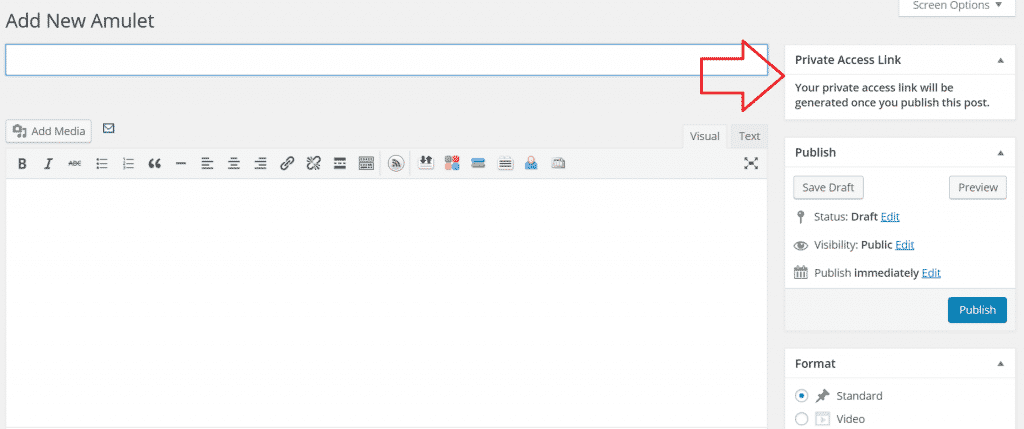
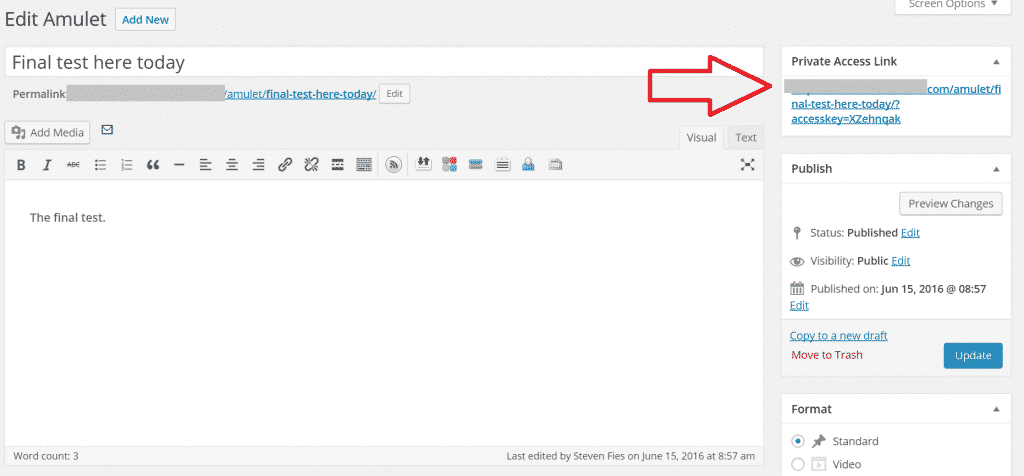
You’ll also notice the system generates a Private Access Link when you publish a new Amulet or Leader Moment,
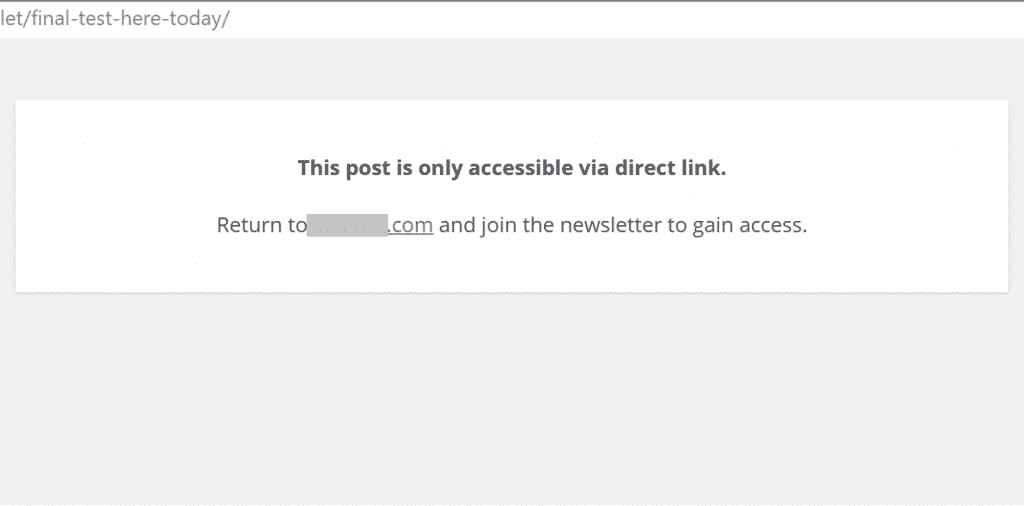
and that you can’t access the published material from the regular permalink – only the private link works.
If you try to use the normal permalink, or any other link for that matter, you’ll get this:
This only works because of the following code added to the very top of the header.php file*:
*Actually, first I created a child theme and then created a new header.php file within it – effectively overriding the parent theme default header.php file. This makes it immune to theme updates and means the original header.php file doesn’t need to be touched.
The Easy Parts: password generation, add_post_meta, child theme header.php update, wp_mail() email confirmation to post author
Certain things were easier than others when writing this code. One reason some things were easy is because other people had already developed much of the required code.
- Custom post classes – made extremely simple thanks to the Custom Post Type UI plugin for WordPress.
- Password generation – made extremely simple thanks to this resource. (Note that for this application, it was not critical to have 64-gazillion bit encryption, just a means of keeping the casual visitor out of certain areas.)
- Custom field creation on post publish (add_post_meta()) – The WordPress Codex explained this easily enough for me to write this without any breakage/issues on the first go around.
- New PHP rules in theme header to restrict page/post access – can’t remember where I found this code snippet, but it required very little modification. In any case, you can now steal mine above if you’d like.
- Email confirmation to post author w/private link upon publication – here again the WordPress Codex had nearly the entire code required for this function. However, it did need to be modified a bit which I’ll explain below.
The Struggles: meta box creation, meta box css styling, get_post_meta() blank & global $post
Despite the fact the above tasks were relatively simple, there were definitely a few hiccups along the way. There was also plenty of code that had to be written from scratch. As someone more familiar with HTML and CSS, and far less familiar with PHP, there were certain things that really tripped me up.
- Meta box creation on the WordPress post editor screen – began with this code and did some slight mods to make it work with the multiple custom post types (namely the foreach statement seen above).
- Styling of this meta box to prevent text overflow – the key here was <div style=”word-wrap: break-word !important;”>, which for some reason took me forever to figure out.
- get_post_meta() not working (for hours…) – this was by far the most annoying aspect of this project…
- Using the global operator to call the correct $post value – …and was completely resolved when I realized calling the $post value with the global operator was required.
What blows me away is how many stackoverflow and github articles had “solutions” that did absolutely nothing to fix the get_post_meta() issue I was having. After hours of troubleshooting, it eventually became clear to me that the local variable $post was undefined and needed to be queried globally.
Conclusion
Please feel free to use and/or modify the above code to your liking.
With minimal effort you can tweak the code to rename/redefine your own Custom Post Types, customize your email alerts, and tailor the PHP error message that displays if someone tries to access a protected post/page without the Private Access Link.
As a final note, please know this code creates a new custom field called “access_key” within your post’s custom fields meta box. The password, or access key, which is generated and stored there, can be modified on the post editor screen in WordPress, but be careful – this will update the singular link capable of accessing the page, and any previously distributed links will no longer work.


Very useful advice. It’s the little changes that produce the largest results. Thanks for sharing!
Thanks for creating this code! I myself seem to have incorrectly uploaded it to my site (it’s not working), and was wondering if I could get some assistance to combat my stupidity. I pasted the exact code into your My Custom Functions plugin, and then added the code to my child-theme header.php file, but the URL with the access code is sending me to my 404 page like so: http://macflynn.com/amulet/cookie/?accesskey=AFbWc811
Any idea where I might have hit a snag?
Hey Mac! You’re welcome, and I’m sorry to hear about the issues you’re running into here. At first glance it appears the PHP validation isn’t executing. Did you create (and activate) a child theme, copy your header.php file over (from parent to child), and finally add that second code snippet to the very top of that file?
I did add the second snippet into the top of my child theme header.php file.
Mac, we may need to jump on a quick screen share so I can help you troubleshoot. Wanna send me an email from my Contact page so we can connect directly sometime soon?
hello steven…iam in need of such a plugin like this. i installed functions plugin and copied the code in but nothing changed. would be great if you could point me in the right direction
John, it would be great to develop a plugin to encompass this entire functionality someday. For the time being, remember in addition to adding the code to your functions.php file, you also must add the second piece of code mentioned in my article into your header.php file. Alternatively, you could create a custom header file to only run the code on specific pages/posts.
Hi Steven,
I want to hide my website from public view and can be accessible with shared link only.
Can you please help?
In addition to the functionality described here, there’s a plugin called “Hide My Site” that you might find helpful. This is more of a password-based approach (rather than link-based), but you can get it up and running in less than a minute. This is what I might recommend you try for a quick solution. If you still have questions about my original post, however, please feel free to let me know.
Hey, here’s the solution for people who keep getting “404” on their protected page:
Go to “Settings > Permalinks” in you Admin and change the permalink structure to “default”. Save it.
Then, change it again to your desired link structure (like, “post name”) and save it again.
Is there a possibility of utilizing this code to create custom pages that utilize the Gutenberg editor (instead of posts)?
My apologies for the delayed response. This is most likely possible, but I am not 100% sure… you would probably need to play with selectively enabling/disabling the editor as desired for the custom post type in question.
Thanks for this! Exactly what I needed. But I’m wondering—is there a way to have the accesskey value regenerate via the click of, say, a “Reset” button? Or perhaps on post status change? (From Published to Draft, have the accesskey postmeta delete thus re-publishing it generates a new key value.) I’ve tried a number of things but with no luck. Basically, I’m looking for a way to easily reset the keys. Any and all insight would be greatly appreciated!
The easiest solution is to scroll down towards the bottom of your post editor page, and then manually update the “accesskey” custom field. You can simply highlight what’s there, delete it, bang on your keyboard to generate some new random characters (lol), and then click the little “update” button in the custom field editor. Done and done – just refresh the page and you’ll notice the special access link will be updated.
If you still want to rework the code anyways (to build something more automated) – my best recommendation for a starting point would be to add a new hook for when post status is changed (see: https://codex.wordpress.org/Post_Status_Transitions and https://developer.wordpress.org/reference/hooks/transition_post_status/). From there, you can potentially duplicate and modify (or rework) the “else” part of the following:
if (isset($accesskey_value)) { $permalink = get_permalink( $ID ) . “?accesskey=” . $accesskey_value; }
else { $permalink = get_permalink( $ID ) . “?accesskey=” . $password; }
For example, instead of just plugging in the previously set key you could code it to generate the password again. You may want to clean some of this up by tucking this stuff into new functions, and then call those functions when needed.
I can see the allure of having a “reset” button instead, but considering the time it would take to build, settling on the manual solution mentioned above seems more practical.