
Mautic – Free Open Source Marketing Automation
Mautic is a free, open-source marketing automation software system. It can be setup through the Mautic cloud or installed directly on your server (preferred).
Mautic has already saved me hundreds of dollars. In the long run it will surely save me tens of thousands. The simple fact of the matter is that most commercial solutions are very overpriced. Whether you are using an exclusive email client (Mailchimp, AWeber, Constant Contact, etc.) or something more comprehensive (HubSpot, Infusionsoft, etc.), you can easily pay into the hundreds of dollars per month.
Mautic is still early in its development, but do not be fooled: the platform is already very robust. The developers have done a great job releasing timely updates and bug fixes. Furthermore, they are responsive on the Mautic support forum. Community members frequently chime in with answers to common questions, too. Overall it’s a friendly and helpful place to be.
Seven Reasons to Use Mautic for Marketing Automation
Let’s now review seven specific reasons to use Mautic for your company’s marketing automation needs:
Mautic is Free (not “freemium” – actually 100% free)
Because Mautic is free, the sole motivation for its development is functionality. There are no financial interests, corporate interests, or outside motives playing into its evolution. Furthermore, there are no referral or affiliate fees to be made for supporting its use.
All Resources Are Aimed at Development of the Mautic System
The developers and the community behind Mautic all have a common goal to develop a powerful marketing automation system that frees them of the corporate bloat of commercial solutions. Virtually no time or money needs to be spent marketing and selling their software, because that is not the purpose. All resources are aimed at developing a functional end product.
Mautic Works Reliably and Effectively
The real reason I support Mautic is because it works. And as time goes on, its functionality will only continue to improve. It already has a number of options for creating forms, scoring leads, developing autosponders, and creating if-then hierarchies for marketing automation.
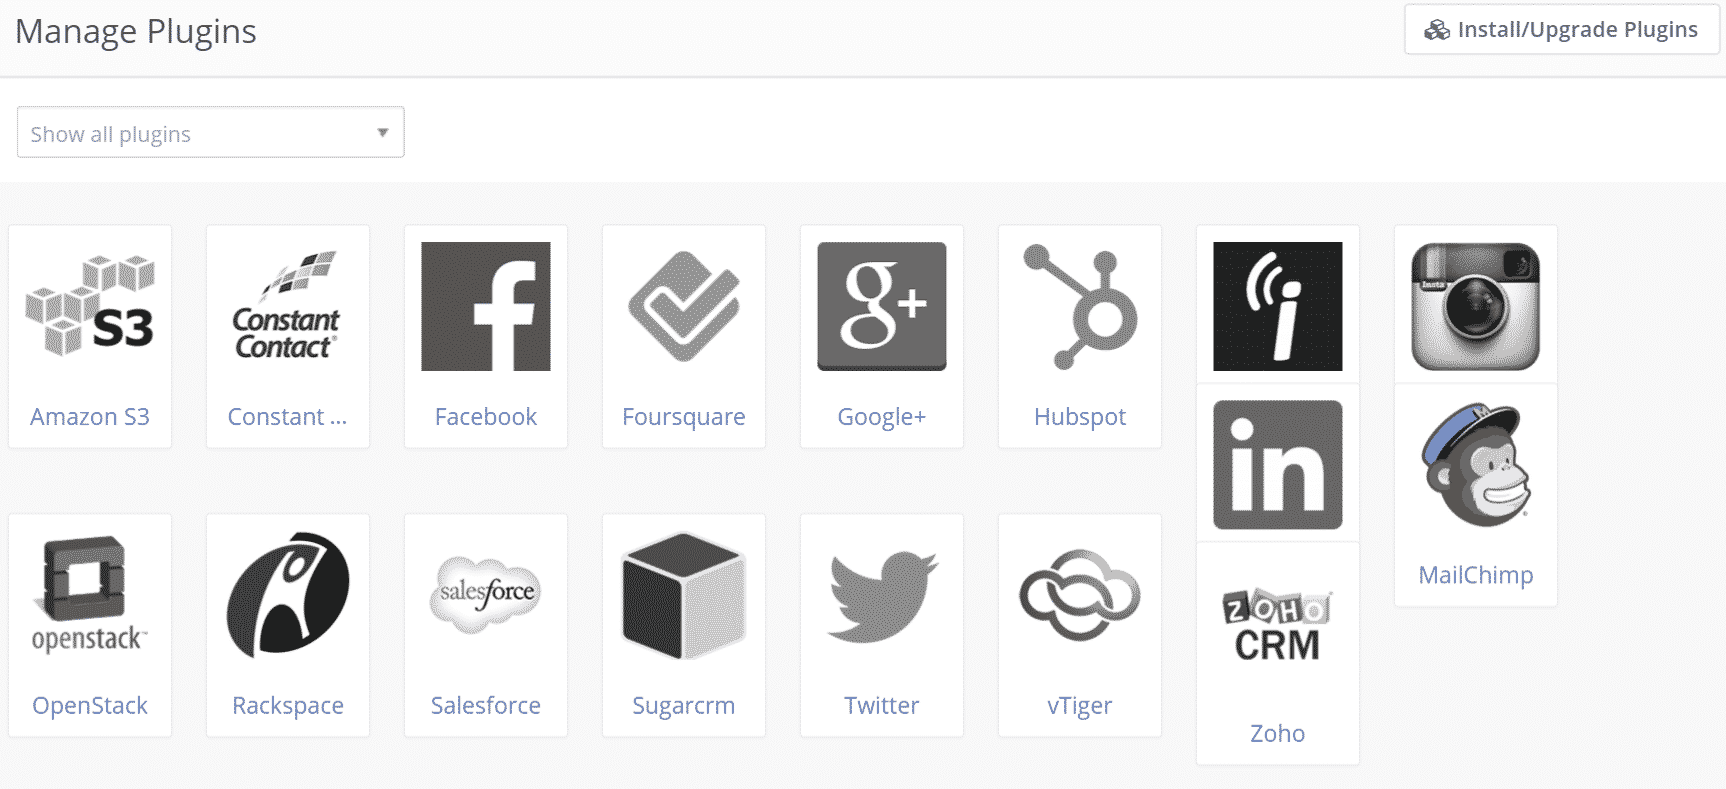
There are already many integrations in place for existing mail systems and CRMs:
It’s handling my leads properly and the configuration is solid within my VPS server. It does take a little technical know-how to setup CRON jobs, but other than that it’s pretty much plug and play. It also tracks IPs and uses a tracking pixel to determine pages visited, links clicked in emails, etc.
Mautic is Not Limited Like Many Other Marketing Automation Systems
Mautic gives you full control over your handling of leads. Something very frustrating about Mailchimp was needing to group contacts within a single “master list” to keep costs down and prevent duplication of campaign efforts. Within Mautic, though, you can simply assign a lead to any number of lists when they submit a form or perform other actions, such as within an automated Campaign. You won’t need to spend hours reading Mailchimp’s support documents and re-configuring your lists with them to achieve simple segmentation goals. The process in Mautic is easy and intuitive.
Mautic May Improve Your Email Inbox Delivery Rate
In Mautic, you can configure your email sending settings however you’d like. Whether you tie into a scalable solution like Amazon SES (I’m working on this right now) or host from your own server, you get to choose where your email comes from and goes to. And at least in my case this has improved my inbox delivery rate.
Emails coming from the dedicated IP on my VPS server are arriving in people’s inbox, whereas the mail I had previously sent from Mailchimp often would land in the gmail “promotions” tab. Mautic’s email builder is nice, too, including merge tag functionality so you can craft personalized messages.
Mautic’s Campaign Builder is Easy to Use
Whether you’re building a basic autosponder or a more complex campaign, Mautic’s visual campaign editor makes it easy for you to quickly create workflows.

Campaigns can be triggered when leads are added to a list, or when leads submit a certain form. Leads can be added to other campaigns from within a campaign, too. Delay times may be specified, and the system can even be configured to push a lead onto a campaign when their Points total hits a certain value. Basically the system is very flexible and allows you a nice blank canvas on which to design your ultimate marketing funnel.
Mautic Allows You to Own Your Data Forever
With Mautic, you will never be at the mercy of your payment agreement with a commercial solution provider. You own your data forever and have all rights to it. You also have full control over what you put in your email headers and footers.
Obviously, you still must comply with CAN-SPAM laws and market smart. But there are no roadblocks in your way, and if you’d like you can even expand upon the code to create your own functional elements of the Mautic system. Independent development isn’t something most users will take on, but it’s nice to know the flexibility exists for those who do.
How to Install and Configure Mautic on Your Web Server
You can find Mautic’s complete support documentation on the Mautic.org website here. There are three basic steps to installing and configuring Mautic:
- Download the most recent stable release from the Mautic website.
- Upload the included *.zip file to your server and unzip the files.
- Navigate to that file location in your browser and follow the on-screen instructions.
Beyond this, there are a few more steps to ensure a proper configuration. Let’s look at these one by one.
Setup CRON Jobs
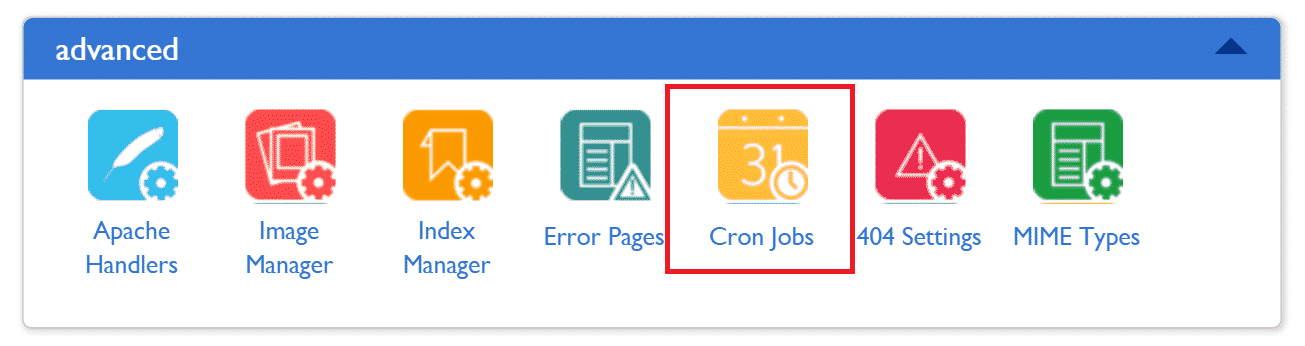
If you aren’t familiar with CRON jobs, web server management, php, or scripts, don’t worry. I wasn’t either when I got started with Mautic and it took me less than an hour to figure it out – from scratch. In most web hosting accounts you’ll find the CRON job manager in your cPanel under “Advanced” settings:
Clicking on this will bring you to the CRON job manager, which looks like this on Bluehost:
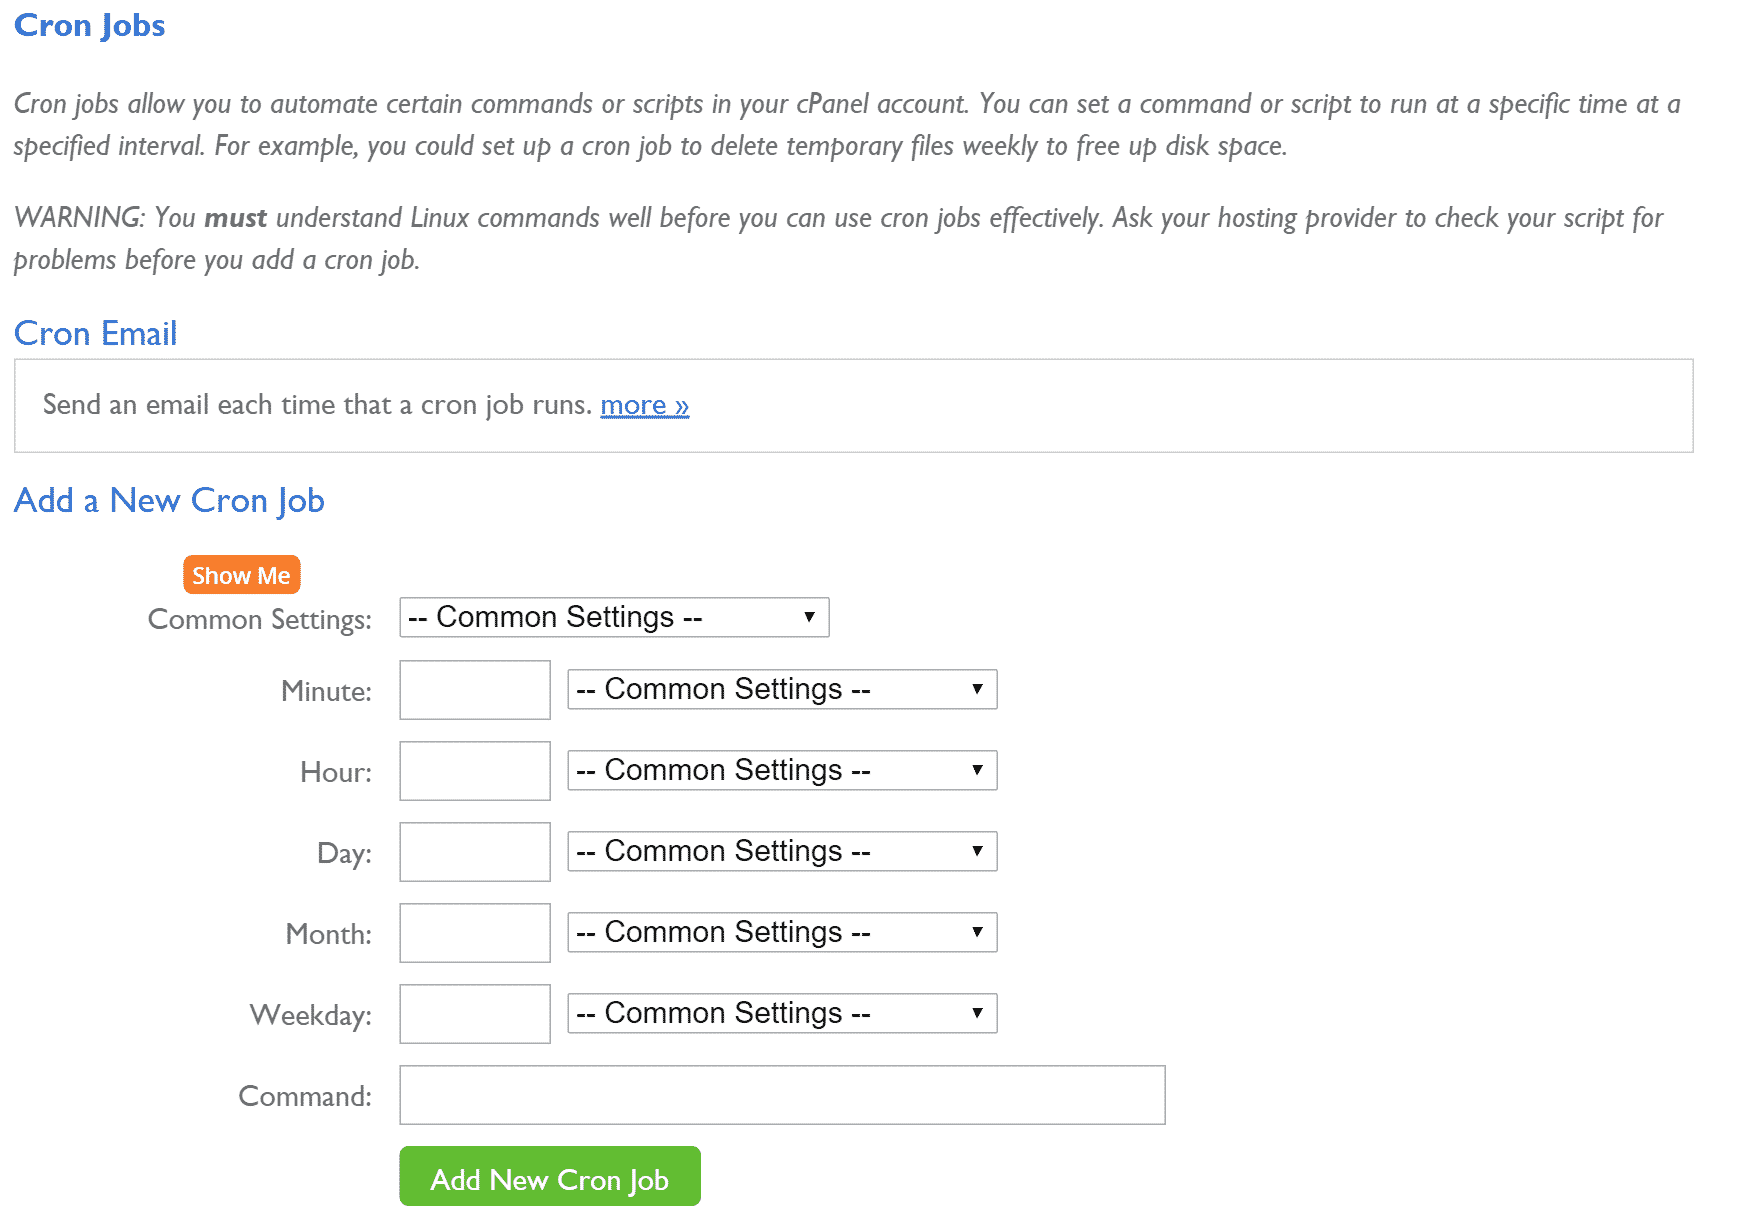
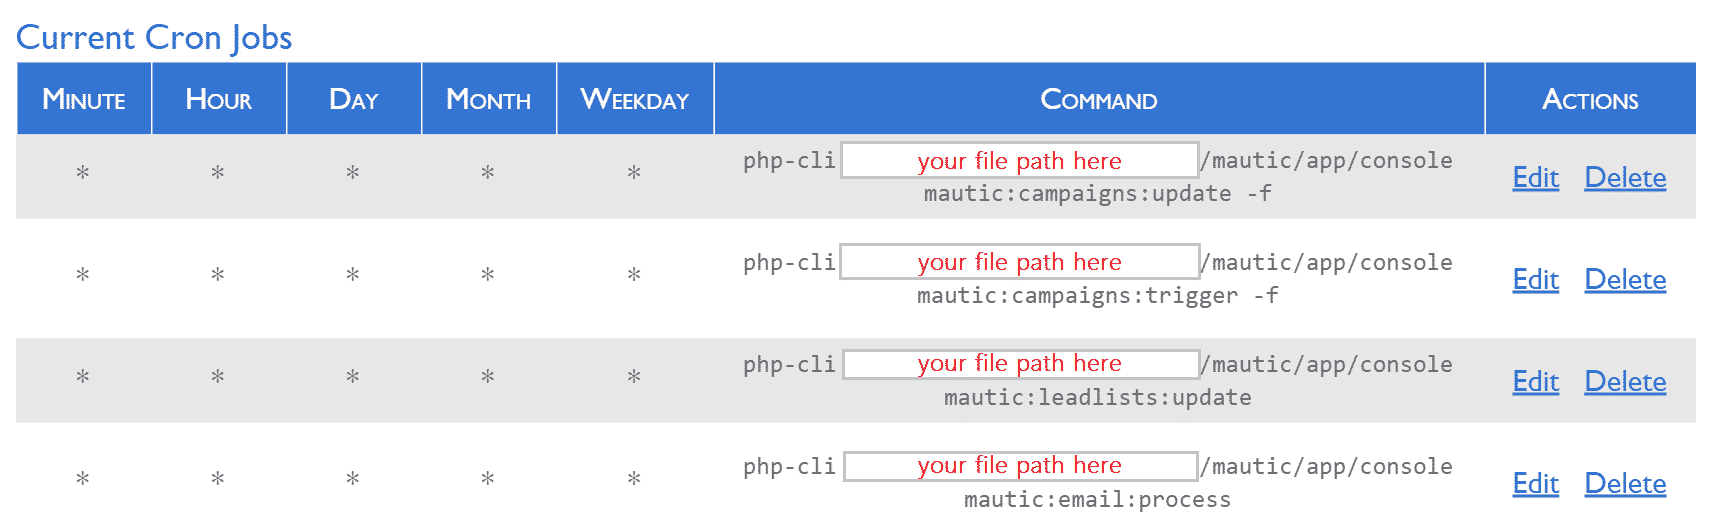
These are the basic CRON jobs you’ll need to setup on your server for Mautic to work correctly:
To update Lead Lists: php /path/to/mautic/app/console mautic:leadlists:update
To update Campaigns: php /path/to/mautic/app/console mautic:campaigns:update
To trigger Campaigns: php /path/to/mautic/app/console mautic:campaigns:trigger
For those of you total noobs out there (like me), please realize the “/path/to” part of this code (highlighted in red above) needs to be replaced with YOUR unique file path from your web host. You will need to navigate to your cPanel and into your File Manager to determine exactly what yours looks like.
Finally, if you choose to Queue your email (rather than send immediately), which is advisable if you’re working with lead lists of any size or volume, you’ll also need to setup the following CRON job:
To trigger Queued Emails: php /path/to/mautic/app/console mautic:email:process
Notes:
On Bluehost, the proper php call format is not just “php” but rather “php-cli.” This took me a few minutes of head scratching to figure out, but don’t worry – if your CRON jobs aren’t working, this may be the reason why. Hence the proper format for Bluehost is php-cli /path/to/mautic/app/console mautic:item:action.
Furthermore, you may need to “force” certain CRON jobs by appending the operator “-f” to the end of your php calls. This looks like: php-cli /path/to/mautic/app/console mautic:item:action -f.
Setup IP Tracking
From within the Mautic – Configuration menu, I’ve been using the Freegeoip.net service without needing to setup or configure much of anything. It’s been working effectively to track and identify my leads. There are a number of available services you can use for this, though – it’s worth getting one working so you know where your leads are coming from.
Install Your Tracking Pixel
The format for the Mautic tracking pixel, which you can install on some or all pages of your website is:
<img src=”http://yourdomain.com/path/to/mautic/mtracking.gif” />
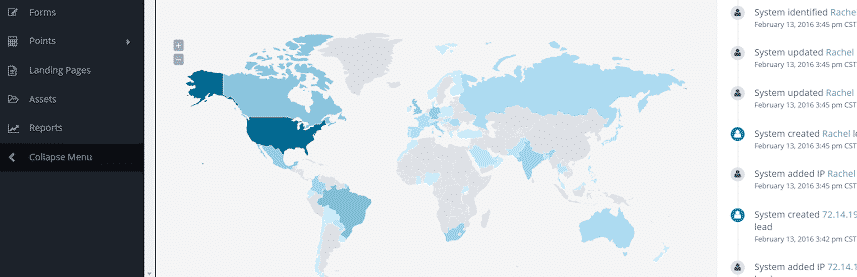
Remember to replace the parts highlighted in red with YOUR domain and file path information, or the pixel will not work. This will be obvious to some but not obvious to others. The tracking pixel is very helpful because it allows you to leverage Mautic’s world-map dashboard to see visually where your leads are coming from. Furthermore, it allows you to see exactly who is accessing what pages of your site and when.
By the way, if you are using WordPress there is a plugin available to help you with this: https://github.com/mautic/mautic-wordpress#mautic-wordpress-plugin
That’s it! Now enjoy your install of Mautic.
At this point, you’ll need to go into your dashboard and configure your workflows, template emails, point scoring rules, and the like. But the above steps are the only ones you’ll need to take in order to setup the Mautic system in the first place. Even though some of the final steps are a bit technical, they are pretty easy for anyone willing to dive in and get their hands dirty for a few minutes.
If you need help or have questions, please comment on this post below or visit the Mautic support forum here. Enjoy!
Are you still using Mautic Steven? If so, a field report would be great after a fair amount of use. How much maintenance does Mautic require?
Hey Alec, yes I’m still using Mautic. I agree, I should probably write a field report soon. For the time being, what I’ll say is that I have no major complaints. There was one instance where stuff broke pretty badly during an upgrade a few months back, and every day they’re continuing to add functionality and sort out various bugs.
In general though, my connection to Amazon SES via Mautic is seamless and functions perfectly to deliver email to all of my subscribers. It’s very predictable and the autosponders I’ve setup via Campaigns work as expected.
There was one point where I had to change my IP mapping service over in the back-end configuration, this was somewhat recent – the past few weeks/months – because the existing one I’d been using (sorry, can’t remember the name right now but will update later) stopped working. Actually, what you could tell happened was the IP service in question was getting hit with so many requests, it was almost like a DOS attack and it was causing my website to time out. The IP service I’m using now is one of the downloadable ones (onto my server) so I no longer have the time out issue/dependency on the external API.
Features I really want, but which aren’t available yet (to my knowledge) are:
-Ability to recognize if a user has replied to an email, and use that as part of the decision-tree for campaign actions (https://www.mautic.org/community/index.php/1315-adding-replies-to-email-to-campaign-decisions/p1#p8141)
-Viral sharing/email referral type functionality, which generates a custom trackable URL for each subscriber that they can share to earn incentives (https://www.mautic.org/community/index.php/1348-feature-request-unique-tracking-referral-urls/p1#p12123)
-Schedule emails during specific hours / times of day / timezone functionality – MailChimp and AWeber both have this. (https://www.mautic.org/community/index.php/2771-sending-campaign-emails-during-specific-hours/p1#p8329)
-Sales CRM type functionality w/corresponding reports (can’t find the link, but there’s a forum thread on this too)
This is a really great temporary field report Steven. It sounds like for now Mautic is more or less just an email sending tool with built-in autoresponder functionality. Scheduling emails and some kind of basic sales CRM seem fundamental for reaching the marketing automation promised land. I’m peppering you with questions as we’re thinking of diving in, including doing some additional development. We’re also looking at Odoo.com (which is more than just marketing automation).
Hey Steven, I am trying to decide between Sendy and Mautic. Mautic’s workflow is definitely the winner as of now. After going through your report, I have my money on Mautic (of-course, if only money could buy it – thanks FREE).
Thank you for your review. Helped me a lot. My primary reason for moving away from my current e-mail service provider is costs.
Hey Debjit, you’re welcome! Cost is definitely a big deal. No doubt I’ve had some technical struggles with Mautic over the course of time, but the cost is unbeatable for what you get. People are paying (wasting?) hundreds, even thousands of dollars per month for solutions like Infusionsoft and HubSpot, when they could easily hire a developer to install and manage Mautic for a fraction of the cost.
I’m now on a dedicated server running Mautic 2.2.0 with PHP 7.0, and it’s lightning fast. Can’t wait for what the future brings as the open source development team continues to make progress.
Thanks for your review Steven, I’m in the process of setting up Mautic 2.6.1, My biggest challenge has been trying to find the best documentation/info for my setup. I’d like to give web subscribers the option to sign up for an email notification when there’s a new post. Are you by chance doing this through Mautic? I see the box to check “notify me of new posts via email” I used the DIVI theme and have the bloom plugin. This is for a brand new site.
Denise, I’m currently manually sending out notifications to my list — I’m pretty sure this feature request is on the Mautic development team’s radar, but not currently built or available. I’m hopeful they will get their API working more cleanly with Zapier soon, since that opens the floodgates to integrating seamlessly with so many other apps. Just a matter of time I believe…
Hi Steven, love all your info on Mautic and especially find it helpful when you compare it to things like InfusionSoft and HubSpot. On that note, I wanted to ask this question. I see that Mautic.com offers hosted/supported versions of Mautic that they call Mautic Pro. I’m not much of a do it yourself-er and wanted to see what you thought of Mautic Pro vs. something like Hubspot Pro which starts at around 8k/year. Basically I’m asking, how does Mautic compare to something like Hubspot Pro when “free” is taken off the table? What does Mautic do better than hubspot or any other competitor for that reason? Or is the main benefit really just its TCO and if you had $10-15k you’d opt for something like InfusionSoft and Hubspot? It’s been about a year since your last post on the subject so I’d love to get your input! Thanks!
Jeffrey, thanks for your kind words. The main difference between Mautic & Hubspot is this:
Mautic will integrate with almost any existing platform, whereas Hubspot locks you into their integrated web design platform. This isn’t necessarily a bad thing (Hubspot’s model), and for some businesses this makes their lives easier. However, you’re also pretty well “stuck” on their platform at that point, whereas with Mautic you can maintain your web properties elsewhere/use another CMS.
Another factor to consider is Mautic is still undergoing significant development, which is a double-edged sword. I get tons of value as a “free” user managing/administering it myself, and every time there’s a new release I get more features. However, I’ve also encountered my share of bugs — and while these are fewer and far between w/the paid “Pro” version (and often worked out by their folks, instead of yours), Hubspot is almost certainly the more well-developed and reliable platform at this point.
Are you still using Mautic? I installed in on Bluehost shared host but I think I have messed up the cron jobs. I configured it with thrive leads but i’m not able to select segment from it. Is there a way to check if I have setup correctly? Many people also say that Mautic shouldn’t be installed on shared hosting but on VPS. Is it true?
Yep, still using Mautic. Pretty sure you will need to install through VPS, I do not believe you can get it working properly in a shared hosting environment.
I’m using Mautic as well. I have some questions as a fellow user
a) Did you turn off link tracking – I understood google mail servers don’t like this at all….and it impacts deliverability. If you did not I’d be curious if your contact base is < 1000 or more.
b) I find the CRM part of Mautic weak – putting notes in with users is difficult. When I get email responses to outgoing emails – they are sent to my email system which is divorced from Mautic. I'd love to see an entire thread to know what to do with various contacts. Are you challenged with the same?
c) In terms of taking actions on lists of contacts, I actually use excel – I find it easier to go down row by row on a list of contacts and call them, or review my notes as one of the cells in the contact row. It's just so fast. Like paper. Doing this with the Mautic notes features would involve tons of clicking. So Mautic again, doesnt support workflow like doing things with contacts – it is just an email list and campagin workflow
d) Have you managed to integrate contacts from a form on yourwebsite into mautic successfully? I'd be curious how you did that, haven't been successful yet.
a) No.
b & c) Yes, to date it’s not really setup as a complete “Sales CRM” – it’s more just a marketing automation platform.
d) Yes, I don’t have time for a complete explanation right now but you should check out the Mautic help articles on embedding forms. Make sure to check your CORS settings, too, because that can oftentimes break these forms in my experience.
Hi Steven,
I agree that alternatives to Open Source SW is expensive. Mautic is our choice and we offer it to others at affordable rates. I created a site where users can sign up to use Mautic for $49.00 per month with no limits on features and we do all the support. We allow up to 15,000 contacts at this price. This is perfect for users who don’t want to self-manage. Each user gets a separate instance that we manage and support for them. I’ll be rebuilding my website so that it is more visually appealing and provides more info. For the time I’ve used a wordpress page to get started for now. If you want to work our referral arrangement let me know.
Hope you enjoyed a terrific Christmas and are looking forward to the 2020 New Year!
Regards, Richard
Richard, my apologies for the late reply and approval of your comment. Thanks for letting me know, that sounds like a fantastic price for the service being offered all things considered.
Hi Steven, appreciate the response. Hope you have a very successful 2020!